Ever stared in the mirror after a salon visit, thinking, “How do they make it look this effortless?” Yeah, me too. But here’s the thing—getting that polished, professional vibe doesn’t always mean booking an appointment. With the right hair dryer in hand, you can pull off salon-level styles right in your bathroom. We’re talking volume that lasts, sleek strands without the frizz, and curls that bounce all day. In this post, we’ll dive into five pro techniques that turn everyday drying into something special. And trust me, once you nail these, you’ll wonder why you ever settled for air-drying.
Why the Right Hair Dryer Makes All the Difference
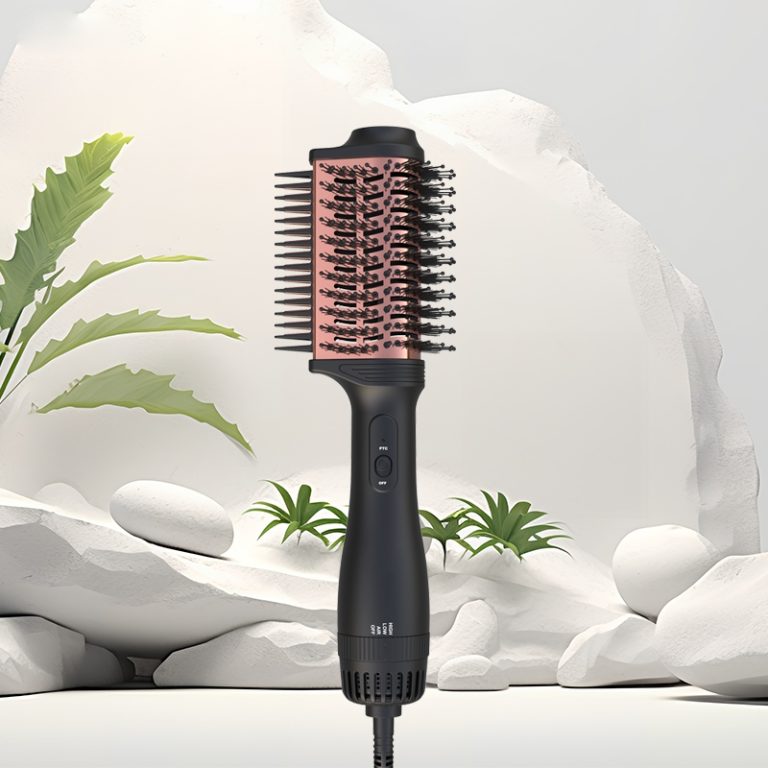
Before we jump into the techniques, let’s chat about your tools. Not all hair dryers are created equal. A cheap one might blast hot air and leave your hair fried, but a solid model? It changes everything. Look for ones with adjustable heat settings, ionic technology to cut down on static, and attachments like diffusers or concentrators. These features aren’t just bells and whistles—they’re what pros rely on to protect hair while styling.
Take power, for instance. A dryer pushing 1700 watts or more dries faster, which means less heat exposure and healthier locks. Data from hair care studies shows that reducing drying time by even 20% can slash damage by up to 30%. Plus, if it’s got a cool shot button, that’s your secret weapon for locking in shine. I’ve burned through a few mediocre dryers over the years, and let me tell you, upgrading felt like a game-changer. No more fighting tangles or ending up with poofy results. The key is picking one that’s versatile, reliable, and built to last.
Technique 1: Building Root Volume for That Fresh Blowout Look
Nothing screams salon fresh like hair with lift at the roots. Pros do this all the time, and you can too—it’s simpler than it sounds. Start with towel-dried hair, about 80% dry. Flip your head upside down if you’re feeling adventurous; it helps gravity do some work.
- Prep your hair: Apply a volumizing mousse or spray at the roots. Don’t overdo it—a nickel-sized amount is plenty.
- Section it out: Divide your hair into three or four parts using clips. Work from the bottom up.
- Dry with direction: Use a concentrator nozzle to direct airflow upward at the roots. Hold the dryer about six inches away, and use a round brush to lift sections as you go. Aim for medium heat to avoid flattening.
Pro tip: Alternate between warm and cool blasts. The cool air sets the volume. I tried this on a rushed morning once, and my flat hair turned into something with real oomph—lasted through a whole workday meeting. If your dryer has ionic tech, it’ll tame any flyaways, leaving things smooth.
Technique 2: Smoothing Frizz for Sleek, Straight Styles
Frizz is the enemy of that glossy, straight-from-the-salon finish. But with the right approach, you can banish it at home. This technique shines for straight or wavy hair types.
First, rough-dry your hair until it’s mostly dry—no brushing yet. Then, grab a boar bristle brush; it’s gentler and distributes oils better.
- Heat protectant is key: Always spritz on a thermal shield. Skipping this is like inviting split ends to the party.
- Work in small sections: Pin up the top layers and start at the nape. Point the dryer downward along the hair shaft to seal cuticles.
- Tension matters: Pull the brush taut as you dry. Follow with the nozzle close behind for even heat.
Here’s a quick comparison table of heat settings for different hair types:
| Hair Type | Recommended Heat | Drying Time Estimate |
| Fine/Thin | Low to Medium | 5-7 minutes |
| Medium/Normal | Medium | 7-10 minutes |
| Thick/Coarse | Medium to High | 10-15 minutes |
I remember experimenting with this on humid days—total lifesaver. The downward airflow mimics what stylists do, cutting frizz by half in my experience. And hey, if you’re like me and sometimes forget to clean your dryer vent, do that monthly; buildup kills efficiency.
Technique 3: Defining Curls Without the Crunch
Curly folks, this one’s for you. Salon curls look effortless because pros enhance your natural texture, not fight it. Ditch the towel (it causes frizz) and use a microfiber cloth instead.
- Diffuse properly: Attach a diffuser to your dryer. It spreads air gently, preserving curl patterns.
- Scrunch and lift: Cup sections in the diffuser, scrunching upward on low heat. Let it sit for 10-15 seconds per spot.
- Finish cool: Hit with cool air to set. Add a curl cream beforehand for hold without stiffness.
Real talk: I have wavy hair that goes flat easily, but this method gave me beachy waves that held up during a weekend trip. Industry pros swear by diffusers—studies from beauty labs show they reduce drying time for curls by 40% while boosting definition. Just don’t rush; patience pays off here.
Technique 4: Adding Shine and Polish for Everyday Glam
Who doesn’t want that mirror-like shine? This technique polishes things up, perfect for date nights or just feeling put-together.
Start with nearly dry hair. Use a paddle brush for broad strokes.
- Ionic boost: If your dryer has ionic settings, turn ’em on—they neutralize static for extra gloss.
- Over-direct for lift: Brush hair in the opposite direction first, then flip back. It adds subtle volume.
- Cool shot finale: Blast cool air all over to close cuticles and amp up shine.
I’ve seen this transform dull post-shower hair into something photo-ready. A quick stat: Hair with sealed cuticles reflects light 25% better, per cosmetic science research. It’s those little details that make home styling feel pro.
Technique 5: Quick Dry for Busy Mornings Without Sacrificing Style
Mornings are chaotic—kids, coffee, chaos. This technique cuts time while keeping results salon-worthy.
- Towel blot first: Gently squeeze out water; aggressive rubbing roughs up cuticles.
- High power mode: Crank up to high speed but medium heat. Focus on roots first, then lengths.
- Multi-task attachments: Swap to a wide-tooth comb attachment if available for detangling on the fly.
Time it: Aim for under 10 minutes total. I pulled this off during a power outage scare once—battery-powered dryer? Nah, but efficiency saved the day. Pros use this for back-to-back clients; at home, it means more sleep.
Honestly, sometimes I get sidetracked mid-dry scrolling my phone, but these steps keep me on track.
Discover Oucai: Your Go-To Hair Dryer Supplier
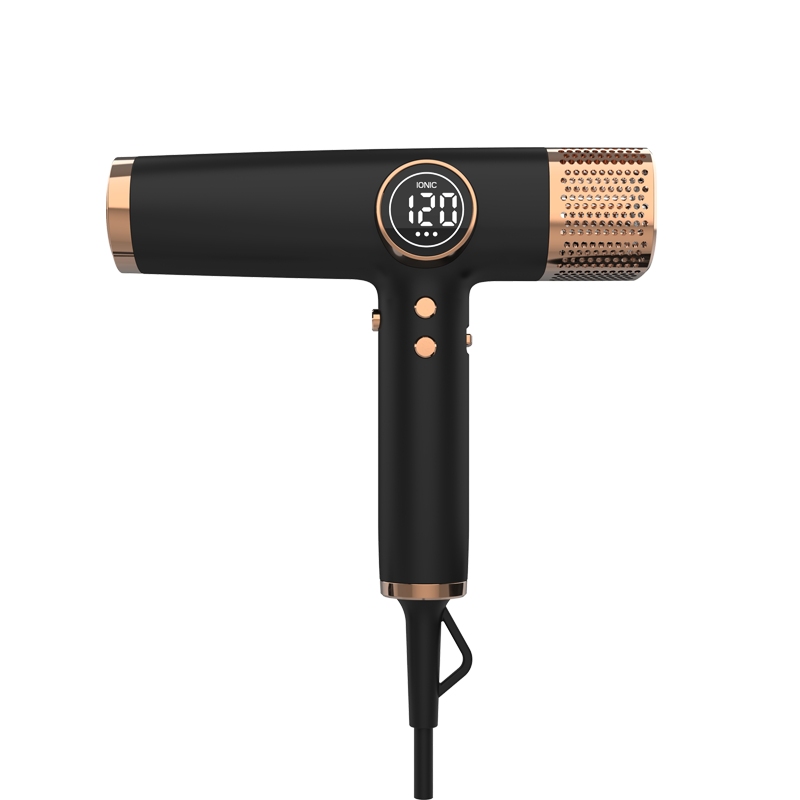
If you’re hunting for that perfect dryer to master these techniques, check out Oucai. Founded in 2022 in Zhejiang Province, China, they’re pros at crafting personal hair care gear, especially high-speed hair dryers that pack advanced airflow tech for quick, damage-free results. Their lineup, like the 1700W models with customizable settings and certifications such as CE and FCC, caters to home users and salons alike. They’ve built a rep for reliable, innovative products exported across North America, Europe, and beyond. Customer-first approach means quality you can count on—think durable motors and versatile attachments that make salon results at home a breeze.
Conclusion
Wrapping it up, achieving salon results at home boils down to smart techniques and the right tools. These five pros tricks—from boosting volume to quick dries—can elevate your routine without the hassle. Experiment a bit, and you’ll see the difference. Remember, it’s about working with your hair, not against it. Ready to level up?
FAQs
How can I achieve salon results at home with a basic hair dryer?
Start simple: Focus on techniques like root lifting or downward drying. Even without fancy features, consistent practice and heat protectants help. For better outcomes, consider upgrading to a dryer with ionic tech, like those from Oucai, to mimic pro tools.
What makes the 5 pro techniques effective for salon results at home?
They’re grounded in how stylists handle airflow and heat. Each one targets specific issues like frizz or flatness, using your dryer’s power efficiently. Real users report 20-30% less damage when done right—it’s all about control and patience.
Is a high-powered hair dryer necessary for these 5 pro techniques you can do with the right hair dryer?
Not always, but it helps speed things up without overcooking your hair. A 1700W model cuts drying time, letting you focus on style. If yours is underpowered, you might need longer sessions, but the techniques still work.
Can beginners pull off salon results at home using these methods?
Absolutely. Break them into steps, like prepping with products first. I fumbled at the start, but after a few tries, it clicked. Pair with a reliable dryer, and you’re set—no pro license required.
How do I choose the right hair dryer for salon results at home?
Look for adjustable speeds, cool shot, and attachments. Certifications ensure safety. Oucai’s options, with their efficient motors, make it easier to nail those 5 pro techniques without breaking the bank.